
Azure DevOps (Formerly Visual Studio Team Services) is a great tool that provides a 1 stop shop for feature management, code repositories and build & release pipelines among others. This article will cover how to create Build and Release pipelines.
Requirements
To follow this article you will need the following tools:
- Azure account
- 1 SQL Server (Azure DB or Azure SQL Managed Instance)
- Azure DevOps account
- 1 Project created.
- 1 Repository with a database project. (Note this repository can be in other repositories such as GitHub, BitBucket, etc.)
Build once Release to Multiple Locations
One of the main benefits of the method that will be used today is the ability of creating one set of Artifacts that will be deployed to several stages. This method ensures that the artifacts being released in QA will be the same released to UAT, Staging and Production.
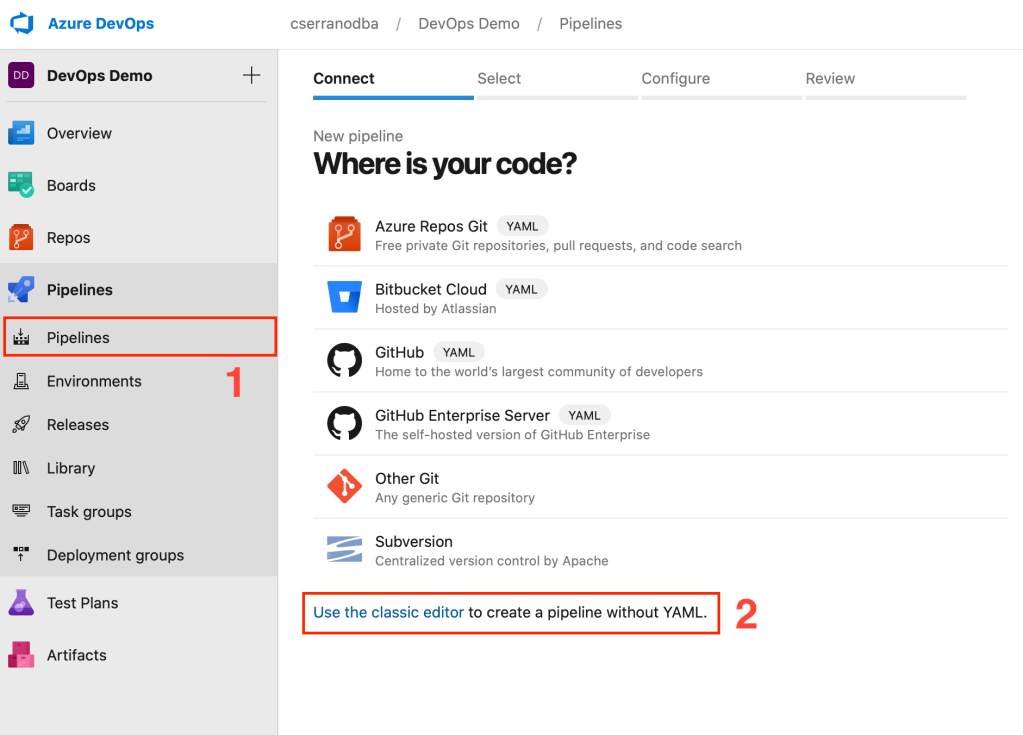
Creating a Build Pipeline
For this exercise I have previously created a project called DevOps Demo and a Repository for it. Now let’s navigate to the pipeline menu and begin creating a build process for our database. For this demo I will use the classic editor which adds an interface to the process, once you are comfortable with the process you might use YAML to programmatically create your pipelines.
Now let’s add a source code to our pipeline. In this case I will use Azure Repos Git, but you may select from the list above.
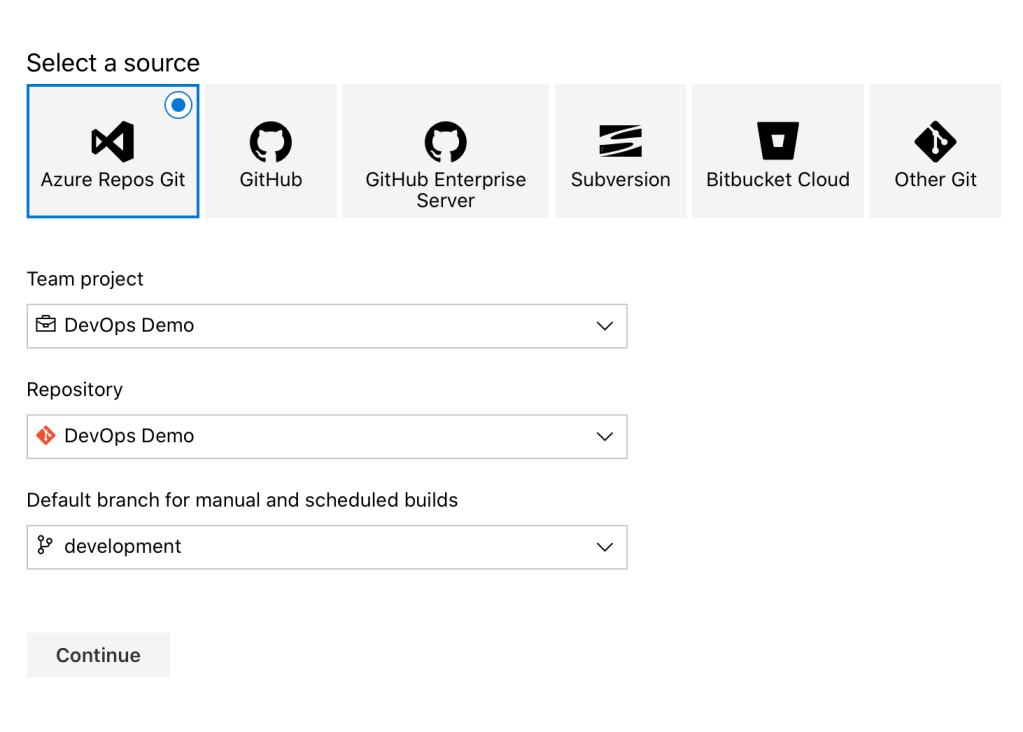
Once your repository is selected, press continue and you will arrive on the template selection workflow. For this pipeline let’s select “Start with an empty job”. Pipelines require a build server for several operations, for a database build we will leverage the hosted build server provided by Azure DevOps. If your organization due to processes or requirements require a private build sever, it can be done by creating a Virtual Machine and installing the Build Agent that can be downloaded directly from Azure DevOps. For the database build there will be 3 components needed:
- MSBuild Step
- Copy Artifacts Step
- Publish Artifacts
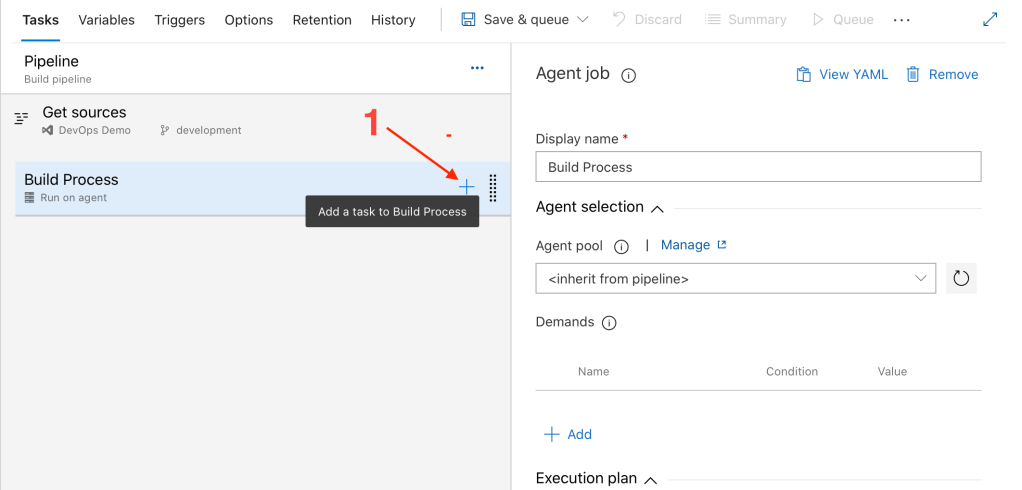
I like to always rename the Agent container to “Build Process” in case you have steps that require multiple Build Agents. The next step will be to add the three steps necessary for this build pipeline. After added these will be configured and the build pipeline will be completed.
At this point all components necessary had being added to the pipeline and this is just a few variables away of being completed. Our first step for this pipeline will be to create a build of our database solution. The steps are as follow:
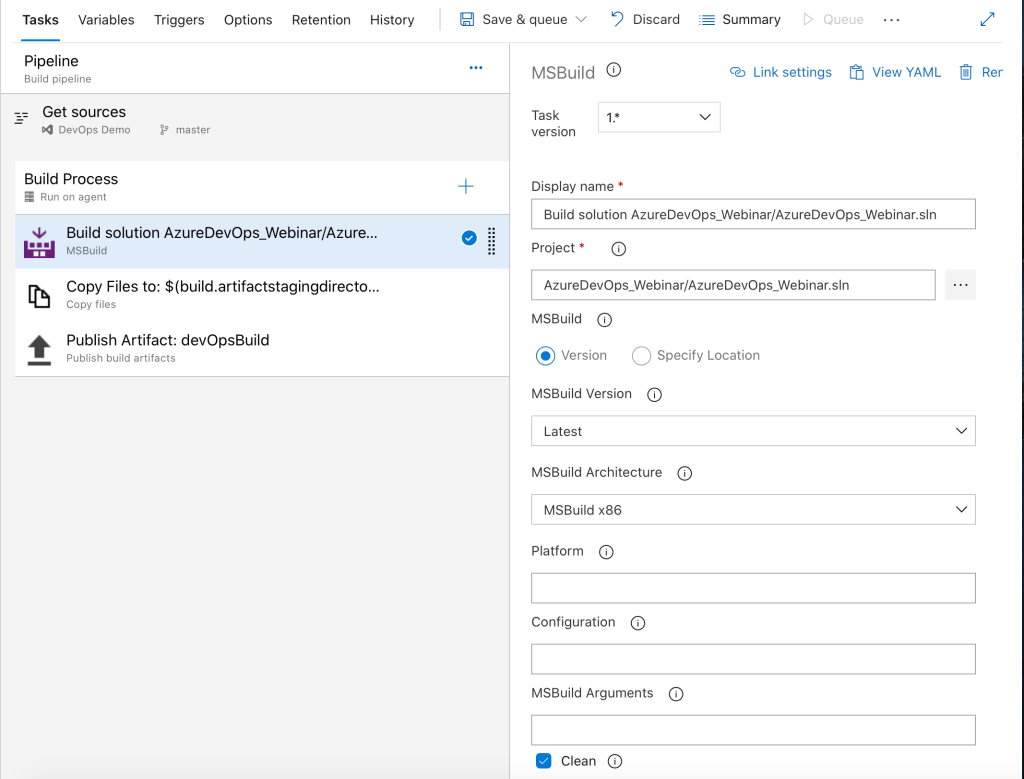
- Click on the project box ellipsis and navigate thru the project path to find your solution file (*.sln).
- If you have any build arguments established on your project, you might use the MSBuild Arguments box to enter them.
- Last step check the clean checkbox to make a Build Cleanup before building.
Now let’s configure the next step as it follows.
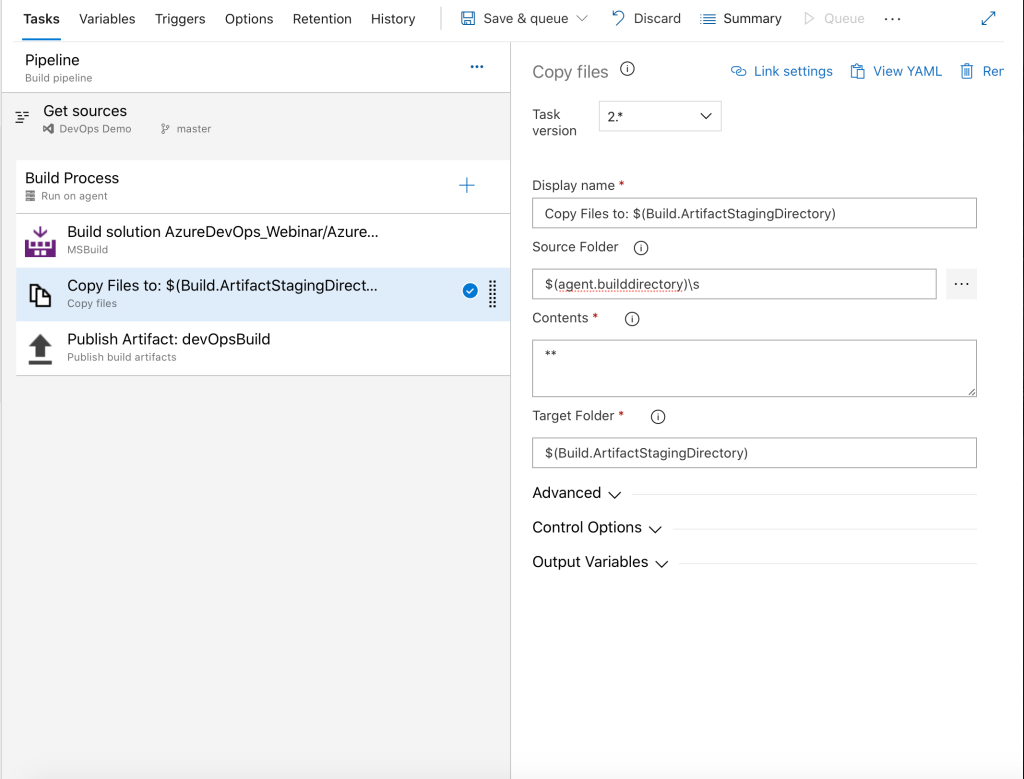
The copy files process gets the results of the database solution build and stages it to an area ready to be uploaded to the artifacts store for Azure DevOps. There are a few important variables needed:
- $(Build.ArtifactStagingDirectory) : This is a dynamic variable that specifies the staging directory.
- $(Agent.BuildDirectory)\s : This variable indicates the copy process to search in the Build Agent used in the solution folder (\s).
- For the contents box in a database solution will just use **. This box can contain additional path in other solutions such as Entity Framework or more complex solutions.
The final step for the build process is the Publishing of the artifacts. This step makes the artifacts available for the release pipelines.

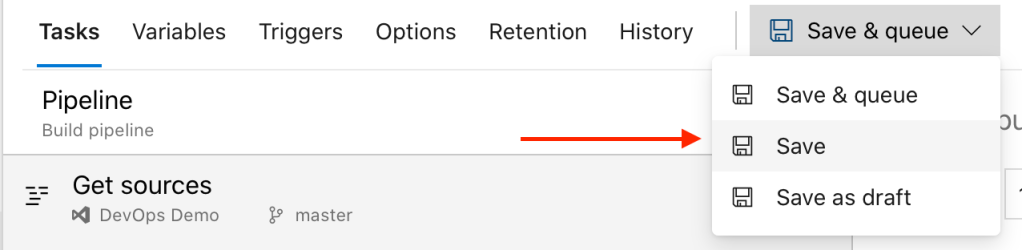
This step is very simple. It requires the use of the $(Build.ArtifactStagingDirectory) variable once more to search for a build output to be published. The artifacts name field provides a way of renaming the Artifacts for better readability on the release pipeline. Once we have these 3 steps ready we can click the save button. Our Build pipeline is now ready.
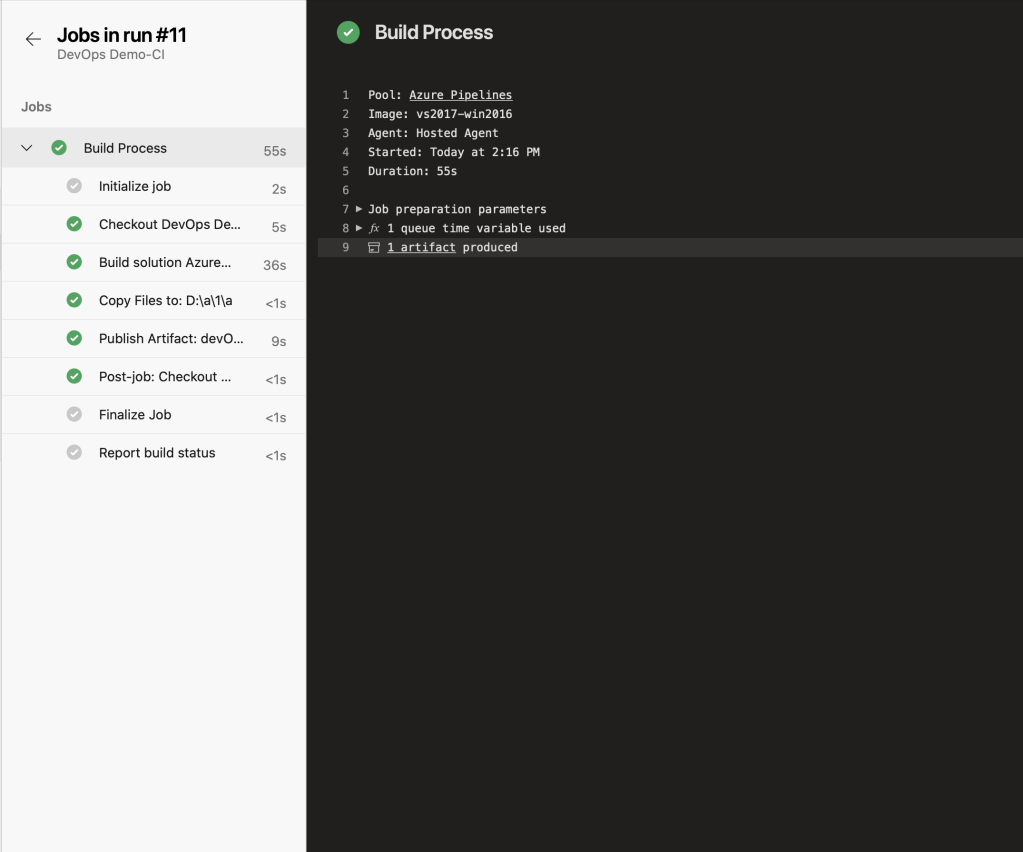
Let’s try this pipeline get ready to create our release. During the build process you may watch the progress. Builds have an auto incrementing number that keeps track of iterations (builds).
Creating a Release
Azure DevOps provide a very simple yet powerful platform to create Releases that can be staged, automatic or even schedule to fit the needs of the user. These releases can be done in parallel or sequential. In order to do parallel deployments, settings and subscriptions must be adjusted to provision more than 1 agent simultaneously. During this release process the following elements will be added.
- Link to Artifacts
- Stages (Environments or Targets)
- Task Groups
- Variables
- Variable Groups
- Schedules and Triggers
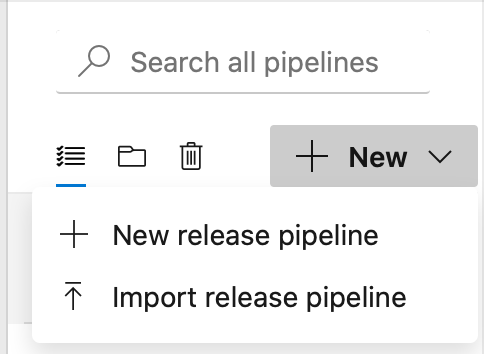
In order to create a release, navigate using the sidebar to the Pipelines menu and create the Releases menu. Once in this menu click on Create Release on the top right corner of your browser.
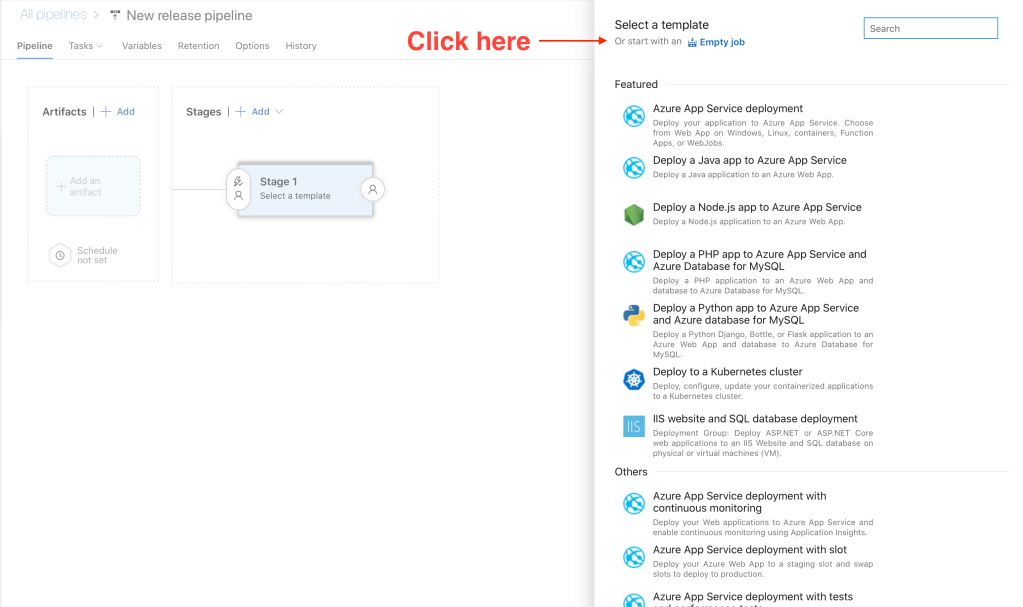
Like in the build process, I will Start by creating an empty job and then customized it for the release. This pipelines have templates available for many types of deployments and platforms. Once the empty job is created let’s take a look the different elements.
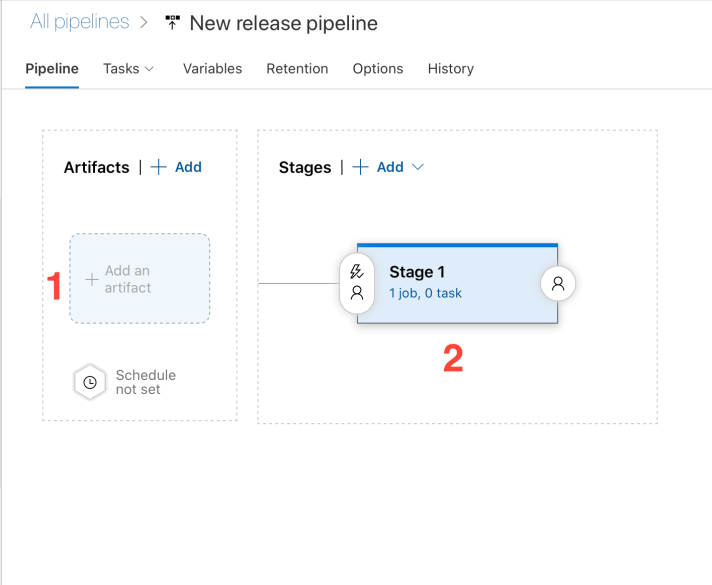
- Artifacts: The artifact section allows the Artifacts package created by a build pipeline to be linked to this release.
- Stages : These can be either environments or steps in our release. For a database deployment these are usually the environment. In this case we will rename Stage 1 to QA. Note: Stages will be processed in serial unless you configuration for parallel releases allows it. Parallel releases will incur in extra cost.
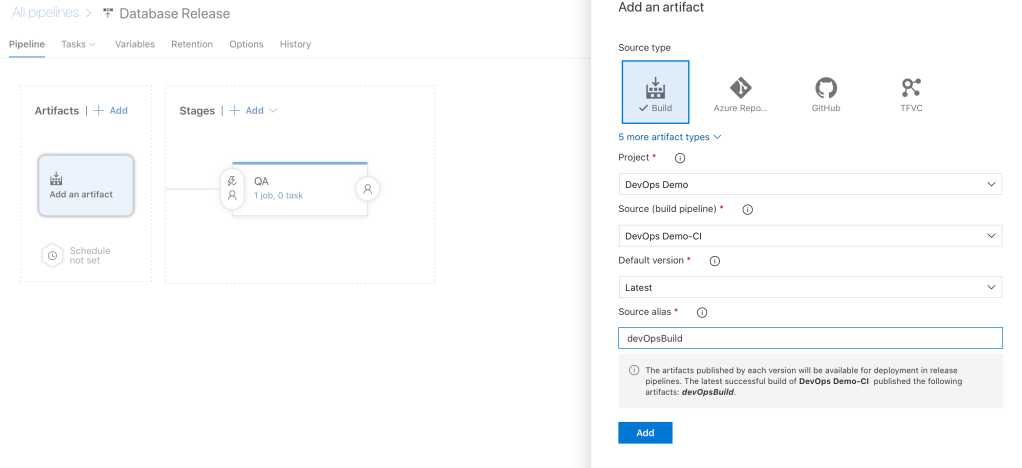
Next, let’s link the artifacts to the build pipeline created below. By clicking on Add Artifacts the following side menu will pop on the right. Let’s select the project, Source and Latest Version for the default version. This will ensure that the latest artifact package available is pulled by the release. The source alias should match the alias established in the build pipeline, in this case “devOpsBuild”. Once this form is completed, simply press Add.
At this point, artifacts are set and we can move towards setting up the first stage for the release. In order to add steps to the stage, click on the URL right below the stage name.
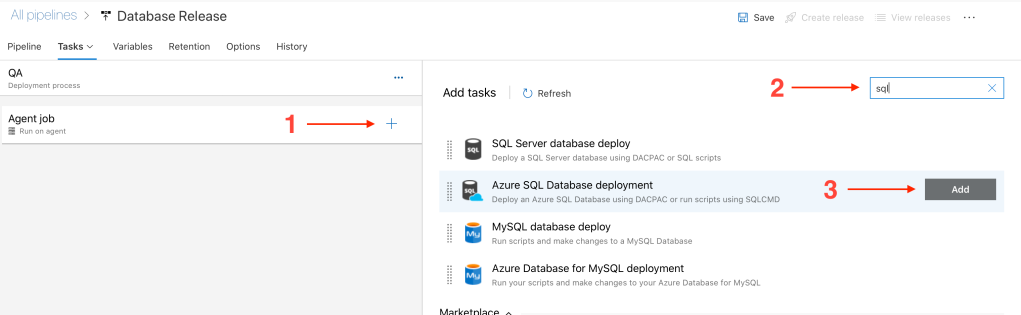
Once in the task, let’s begin by adding an Azure SQL Database deployment task by clicking on the plus symbol to the left of the Agent Job Step, then searching for SQL and finally, clicking Add right next to the desired task.
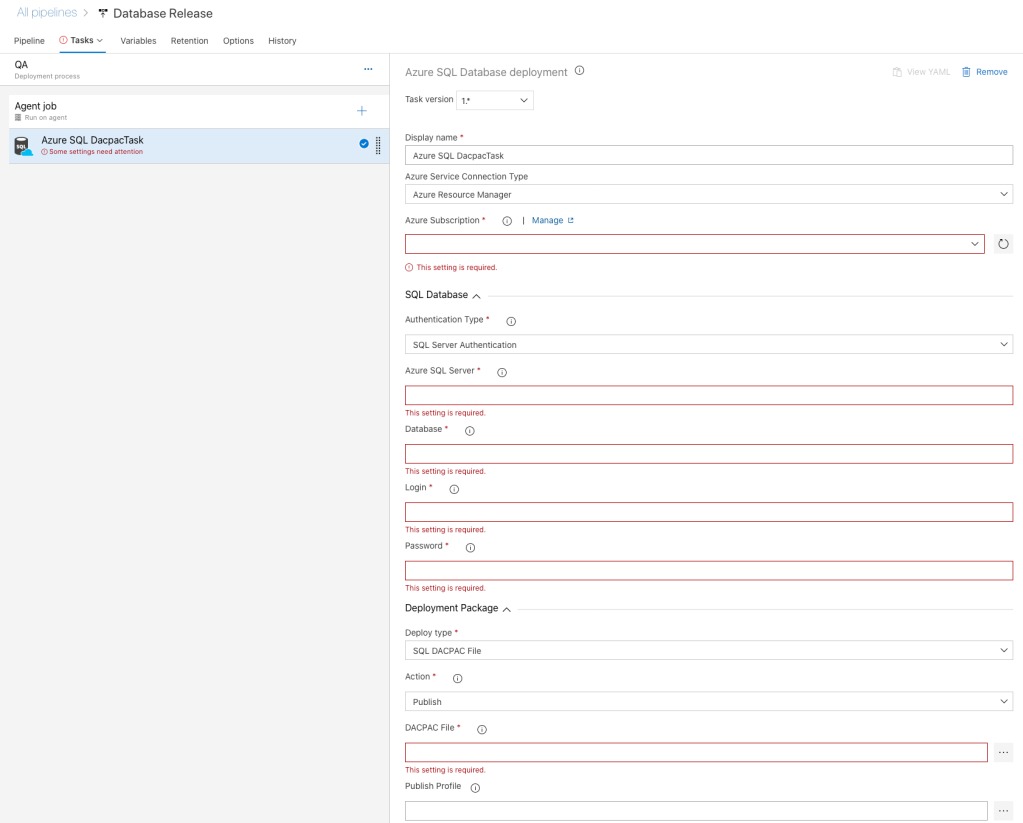
Once the SQL Task is in place, there are several steps needed in order to finalized the release.
- Select Azure Subscription: This step might require creating a principal to connect to Azure upon your first connection. This might require help from an account admin.
- For this quick demo, I will use SQL Authentication as using a service account in Azure will require a few more steps.
- The following fields will be filled with variables names to make the release process scalable and dynamic. Variables will be enclosed in $(VARIABLE) format and the following are neededServer
- Database
- Username
- Password
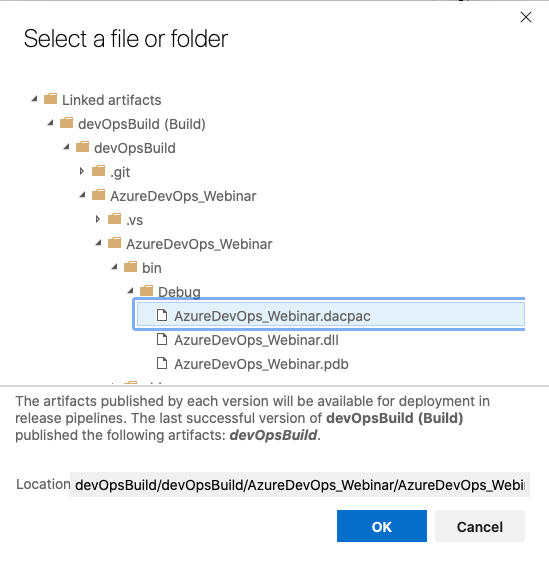
- For the DACPAC Field, let’s click on the ellipsis and navigate thru the artifacts package liked to find the .DACPAC file.
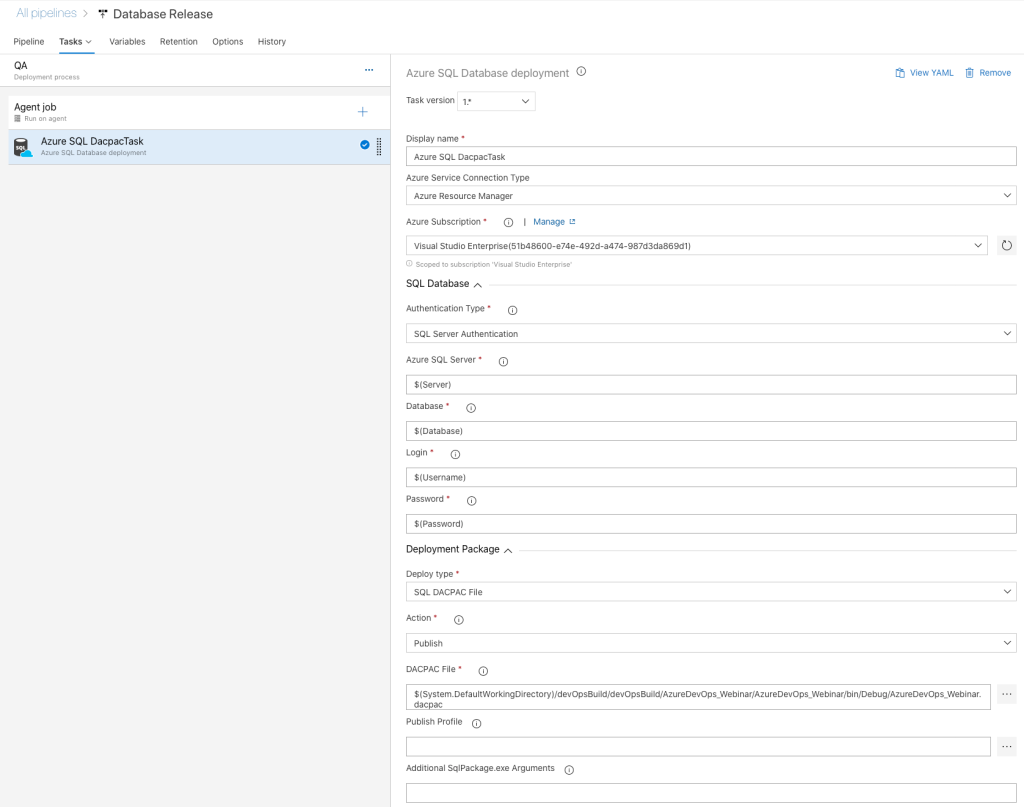
There are two additional boxes, both optionals. Publish profile and Additional SQL Package arguments that you might feel to customized your release process even more. At this point, the release pipeline is almost ready, but variables have being declare but not mapped. Let’s create those.
Variables
Variables can be mapped Individually or by variable groups. Variable groups can be found in the Library section of the pipelines menu. A Variable group allows variables with the same name in different groups to be assigned to a specific stage and standardize how we do releases. Let’s take a quick look at variable groups.
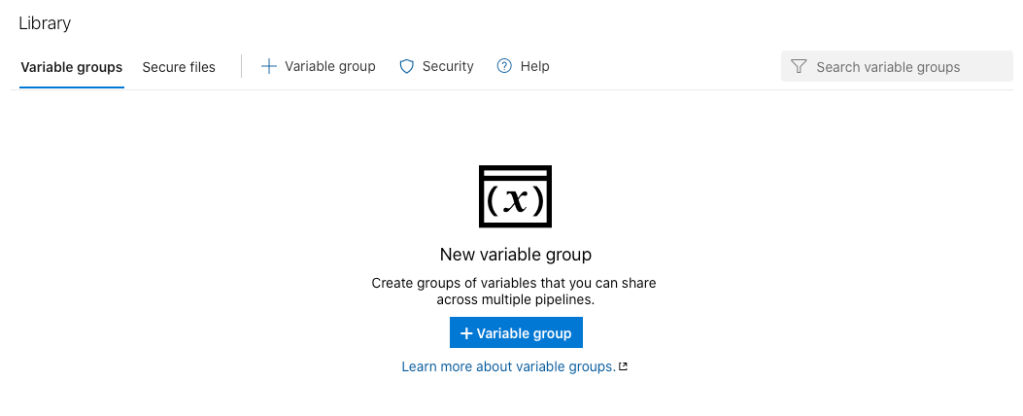
Let’s create a new variable group and customized it for the release. There are 2 options to create variable groups. By entering Key-Pair values on the variable group or by linking your groups to an Azure Key Vault. If you decide you use the key vault, you will be prompted to authorize and create a principal in order to read the key secrets. For this exercise we I will use the default option.
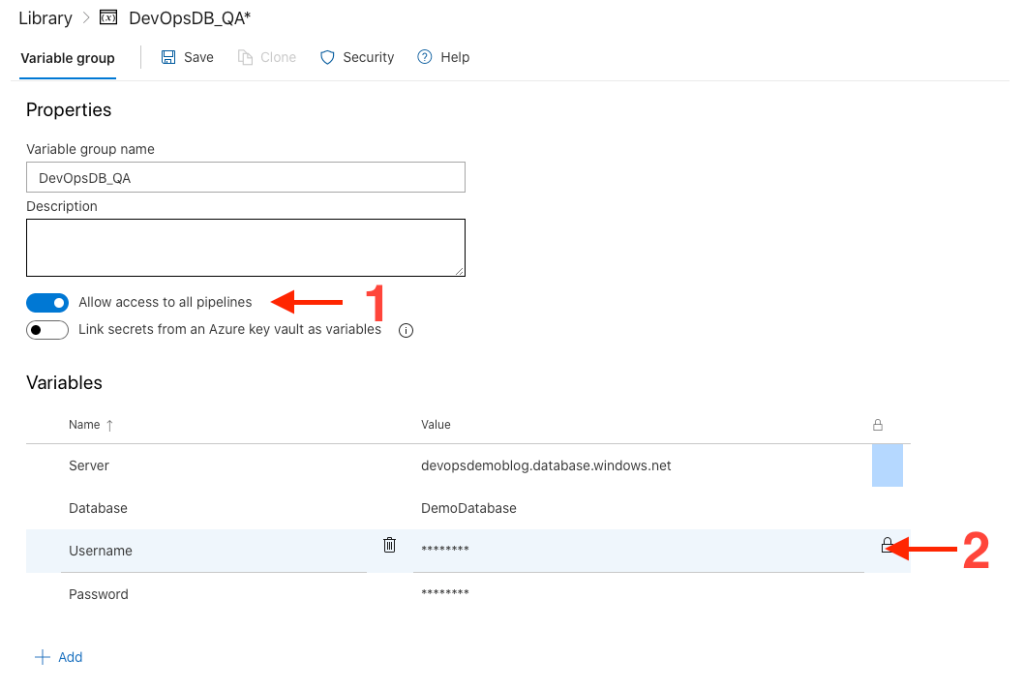
- Ensure that you task group has access to you pipelines.
- If your variable contains sensitive information, click the lock button and string will be encrypted. In order to modify a locked variable, value must be re-entered.
Once you have completed your variable group, you might clone it to create other for more stages in your release pipeline.
Let’s finish that pipeline.
Now that our variable group is created, let’s link it to our stage named QA.
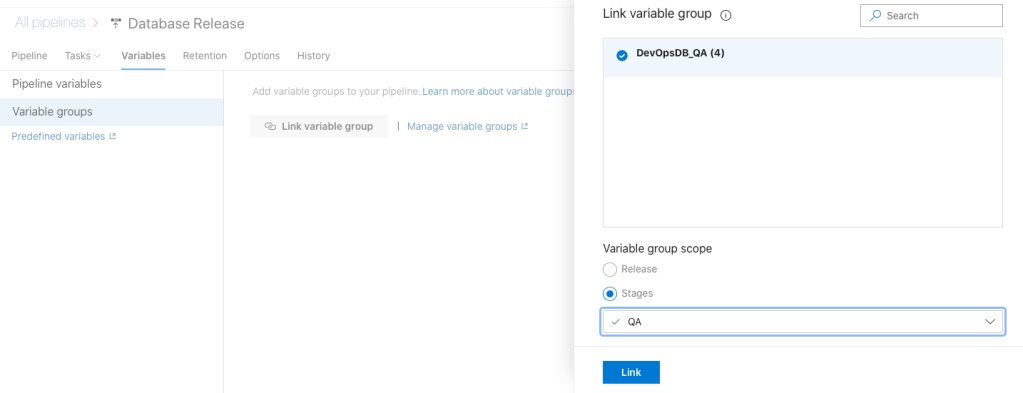
To link a variable group, let’s navigate to Variables > Variable Groups and click on link variable group. Select the group wanted from the groups listed and assign a stage by selecting stages and the stage QA from the drop down. There can be variables that apply to every step of the pipeline and those can be in a group linked to the Release itself. Once selected click link and your variables will be mapped.
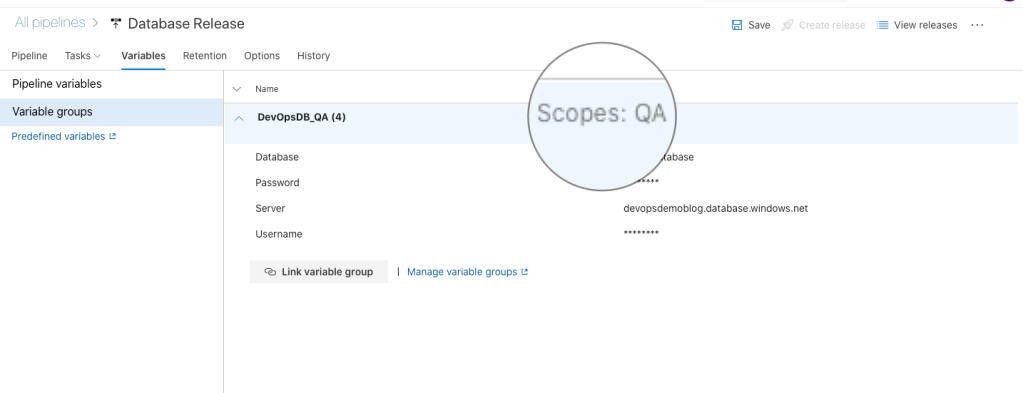
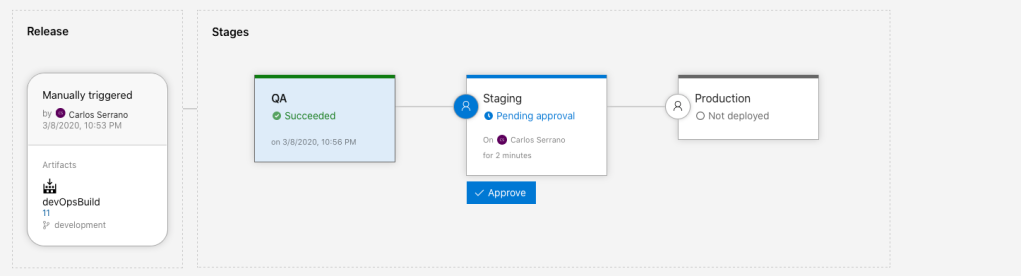
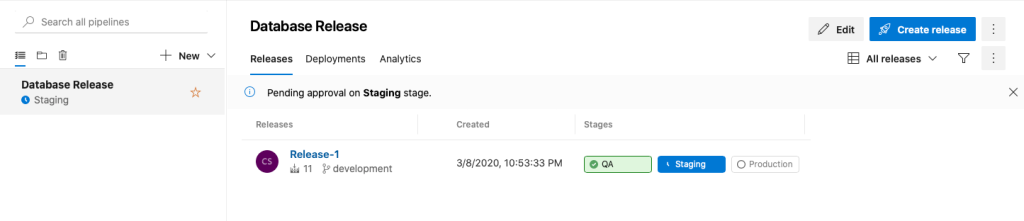
At this point we have 1 Stage fully configured. We can now proceed to release the changes for this stage or we can clone the stage and variable group and expand our release to multiple stages. I will fast forward to have several stages set.
Triggers & Conditions
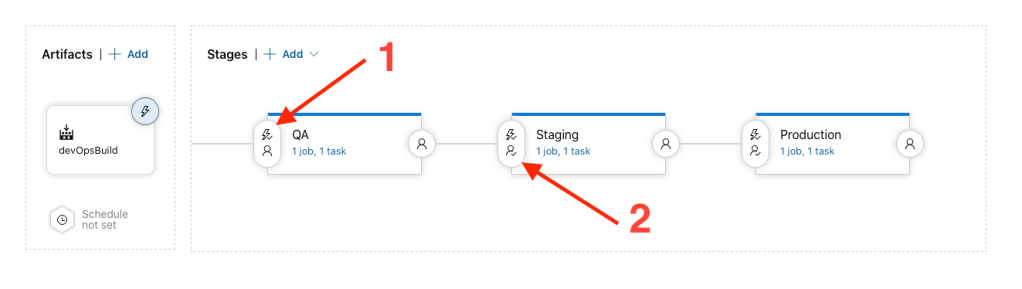
Now we I have fast forwarded to the point were I cloned the stage QA twice and cloned the variable groups (and changed the values) to create 2 more stages. The icon highlighted by number 1 indicates that there are conditions to trigger the following stage. The condition number 2 indicates that there are permissions assigned to the following stage. Let’s review them.
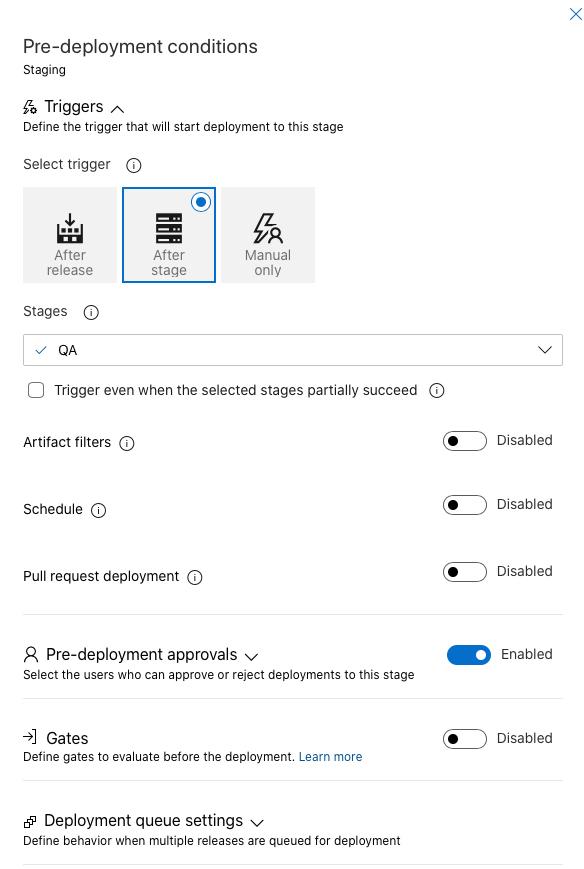
- With the triggers, you can select if a stages deploys automatically after another is finished or manually.
- Pre-Deployment approvals are a great way of ensuring that production releases get approved by the chain of command before starting. This can be a multi approvals process.
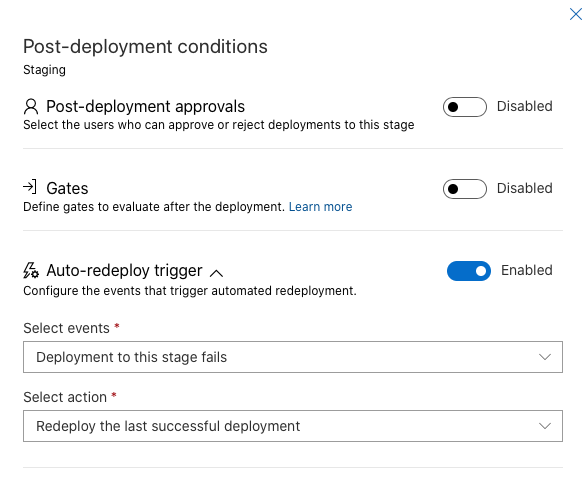
If your deployment fails there is also the option to re-deploy the last successful deployment.
Automatic Releases
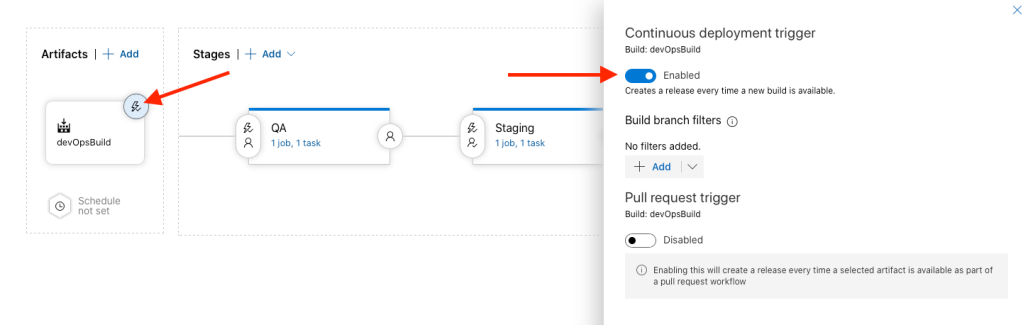
On the artifacts section, you can enable continuous deployment. This triggers a release pipeline every time a new release is available. You can also enable continuous integration trigger on the release pipeline to start a build every time a commit or merge is done to a specific branch.
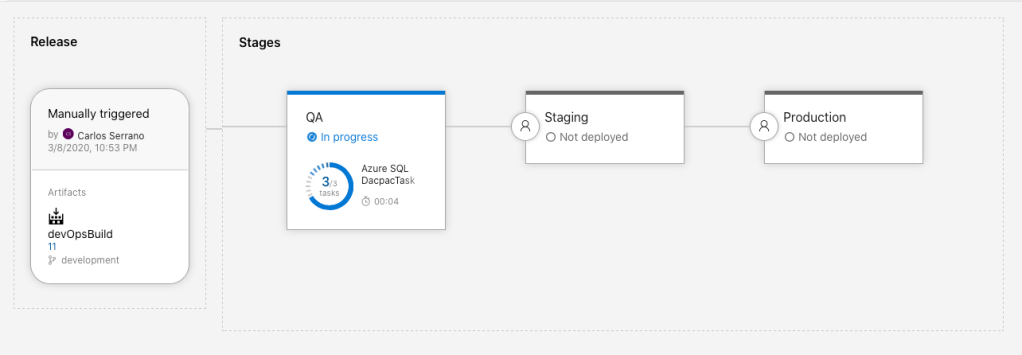
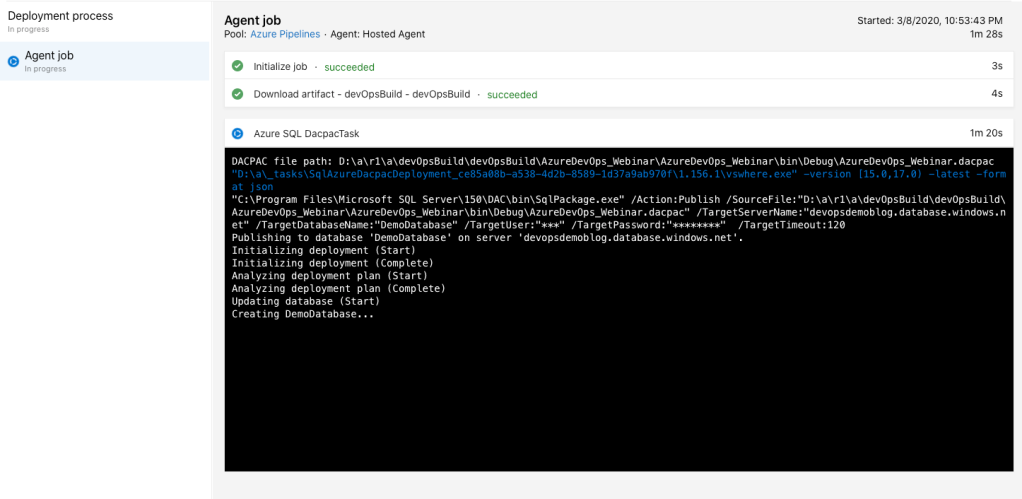
Let’s Deploy!

That’s a Wrap!
As seen, Azure DevOps is a great tool for managing and streamlining releases on Azure resources. Database deployments will depend on your code structure and release cadence but there is enough tools to customized it to your needs. You can also add database tests, backups, PowerShell scripts, Azure Elastic jobs and much more to your pipelines to ensure that everything is covered during your build and release process.
